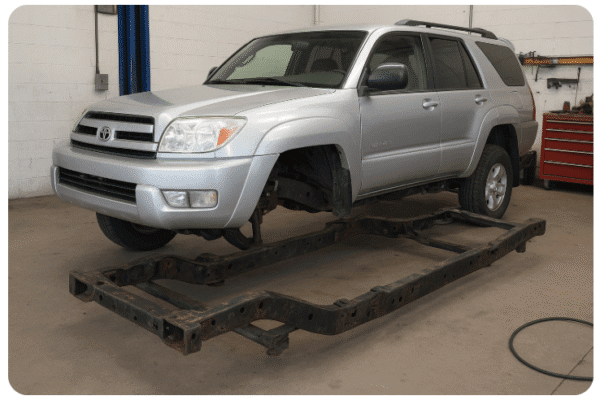
Repairing the frame on a Toyota 4Runner is a big job — and how you approach it depends heavily on the type and extent of the damage (rust corrosion vs. accident bending vs. cracking). Since the 4Runner is body-on-frame, its frame is a structural backbone, and issues need to be addressed properly to keep it safe and roadworthy.
Here’s a breakdown of what you need to know:
1. Common Causes of Frame Damage on a 4Runner
- Rust corrosion (especially in older models or those in snowy/salty regions like the northern US or coastal areas).
- Collision damage — bent or twisted sections.
- Stress cracks — often near suspension mounting points or welds if the truck has been heavily used off-road.
- Poor drainage — mud and debris sitting in frame rails trapping moisture.
2. Assessing the Damage
- Visual inspection — look for holes, heavy flaking rust, or bent sections.
- Tap test — use a small hammer to detect thin metal (dull sound = solid; sharp/tingy sound = thin/rusted).
- Measure frame alignment — a shop can put it on a frame machine to check if it’s square.
- Check mounting points — body mounts, suspension brackets, and crossmembers are critical.
3. Repair Options
A. Rust & Corrosion Repair
- Surface rust → wire brush or sandblast, apply rust converter, prime, and coat with underbody sealant.
- Moderate rust → cut out affected sections and weld in pre-fabricated repair plates or box sections (brands like Safe-T-Cap make these for Toyota trucks/SUVs).
- Severe rust-through → may require replacing entire frame sections or swapping the frame.
B. Bent or Twisted Frame
- Requires a frame straightening machine and precision measurements. Usually done at a collision repair shop.
- After straightening, inspect for cracks, re-weld, and reinforce.
C. Cracked Frame
- Grind out the crack end points to prevent spreading.
- Weld with proper penetration, then reinforce with a fish plate (steel plate that overlaps the repair area).
- Use high-strength steel plates that match or exceed OEM frame metal thickness.
4. Prevention After Repair
- Drill small drainage holes at low points (if not present).
- Wash undercarriage regularly, especially after off-road trips or winter driving.
- Apply rust protection (oil spray, Waxoyl, Fluid Film, or epoxy coating) yearly.
- Keep frame rails free of mud and debris.
5. Estimated Costs
- Small rust patch: $300–$700.
- Section replacement: $800–$2,500 (labor-intensive).
- Full frame swap: $4,000–$8,000+ (often only worth it on newer/rare 4Runners).
If you’d like, I can give you a step-by-step illustrated guide for a Toyota 4Runner frame rust cut-and-weld repair with the exact tools and steel sizes used by many restoration shops. That way you can see what’s DIY-able and what should be shop-handled.
Do you want me to prepare that?
Step-by-step illustrated guide for a Toyota 4Runner frame rust cut-and-weld repair
Here’s a practical, shop-grade step-by-step illustrated guide for cutting out rust and welding in patches / caps on a Toyota 4Runner frame. I’ll give exact tool & consumable makes/specs used by restoration shops, recommended steel sizes (with conversions), welding tips to avoid warpage, and how to finish and protect the repair so it lasts.
Quick safety note: a frame is the structural backbone of the vehicle. If the damage is through-and-through, the frame is bent, or you’re not an experienced welder/fabricator, get this done at a collision/frame shop (frame machines, alignment checks, and certified structural repairs matter). The steps below are what pros do — but only attempt this if you have the skills, equipment, and PPE.
1) What most shops use (materials & sizes — quick reference)
- Steel type: mild structural steel / A36 / hot-rolled mild steel (commonly used for chassis/frame work). (alro.com)
- Patch / cap thickness (common practice):
- 11 gauge ≈ 0.119″ (≈ 3.03 mm) — used by many bolt-on / kit repair panels (Rust Buster / aftermarket kits use ~11 ga).
- 3/16″ = 0.1875″ (≈ 4.76 mm) — widely used for fish-plates / caps where extra strength is desired.
- 1/4″ = 0.250″ (≈ 6.35 mm) — used only when you need to match heavy OEM or hi-tensile sections; generally not necessary on a stock 4Runner frame unless building a heavy duty chassis.
(Shops typically pick 3/16″ for cap/fish plates or 11 ga where the kit is pre-cut.) (pirate4x4.com, Rust Buster)
- Welding consumables:
- Solid MIG wire: ER70S-6 (0.035″ or 0.045″ depending on welder / penetration needed). Use 75/25 Ar/CO₂ (or 100% CO₂ for deeper penetration at the cost of more spatter) — standard collision/auto practice. (harrisproductsgroup.com, millerwelds.com)
- Or gas-shielded flux-cored (E71T-1) if you prefer flux core outdoors; self-shielded flux-core (E71T-11) only if you need no external gas (worse finish).
- Protection / coatings after welding: POR-15 / dedicated rust-encapsulator systems and oil-based internal frame sprays (Fluid Film / woolwax) are commonly used to seal the inside and outside after repair. (POR-15, YouTube)
2) Tools, consumables & PPE (exact recommendations)
- MIG welder capable of 200–300 A (e.g., Miller Millermatic 211 or similar) — use 0.035″ ER70S-6 wire spool. Gas regulator + 75/25 Ar/CO₂ bottle. (harrisproductsgroup.com)
- Angle grinder (4½”) + cut-off wheels (thin 1/16″ cut off), flap discs (grinding & blending): 40/60 grit. Wire cup brush.
- Needle scaler or sandblaster (for heavy scale). Sandblasting is preferred for full prep in a shop.
- Welding clamps, backer bars, alignment strongback / C-clamps, magnetic jigs.
- Heavy duty floor jack, axle stands, and frame stands or lift with safety stands. If frame is being straightened use a frame machine (shop).
- Measuring tools: digital caliper, straight edges, measuring tape, square.
- Consumables: ER70S-6 wire (0.035″), welding gas (75/25), weld-thru primer (if needed), POR-15 or epoxy primer, seam sealer, undercoating, zinc-rich primer or galvanizing spray for bare metal.
- PPE: auto-darkening welding helmet, welding gloves, leather jacket/aprons, respirator (for paint/epoxy) and hearing protection.
3) Before-you-start inspection & plan
- Thoroughly inspect the frame (inside of rail and out) — rust often starts inside boxed rails and under body mounts. Use a flashlight and a mirror; probe with a screwdriver. If the frame is bent or the suspension mounting points are out of spec, you need a frame machine — do not just weld. (Shops emphasise checking alignment before/after repair.) (rts.i-car.com)
- Decide repair method: (A) cut-out & weld-in patch (best when portion is localized), (B) cap/overlap (Safe-T-cap style) (good when you can’t access inside), or (C) fish-plate reinforcement (plates welded over a cutout for extra strength). Many 4Runner kits are pre-cut caps that weld in place. (Rust Buster)
4) Step-by-step repair (with what each illustration should show)
Step A — Setup & safety
- Park on level floor; put vehicle on a lift or secure heavy jack stands under frame (not suspension arms). Chock wheels. Disconnect battery.
Illustration: 4Runner on lift with stands under frame rails; battery negative disconnected, wheel chocks shown.
Step B — Remove nearby components
- Remove components that interfere (fuel tanks, brake lines, skid plates, suspension parts if needed). Remove body-mount bolts if working at mounts (label shims).
Illustration: annotated photo showing removed suspension crossmember and cleared work area.
Step C — Mark & cut out rust
- Using an angle grinder/cutting wheel, cut out rusted metal back to solid metal. Cut at least 1″ beyond flaky rust into bright, sound steel. If the inside of the box is rusty, you may need to cut an access port.
Tip: Use a die grinder and carbide burr to remove thin perforated sections. Do not cut into a bolt boss or subframe mounting point unless you plan to replace it.
Illustration: frame rail with marked cut line; a removed panel next to the opening showing rust extent.
Step D — Prep mating surfaces
- Grind the mating edges so they are square or beveled (~30°–45° bevel) for full-penetration weld on a butt joint. Remove all paint, rust scale, and contaminants (sandblast ideally). Clamp and trial-fit your patch or cap.
Illustration: close-up of rail edge beveled, patch test-fit clamped.
Step E — Fabricate the patch / choose cap/fishplate
- Fabricate the patch from A36 mild steel. For a typical 3rd-gen 4Runner: use either 11 ga (0.119″) for OEM-style thin repair kits, or 3/16″ (0.1875″) plate for caps/fishplates where structure must be strengthened. Use larger radius bends to mimic rail profile. (Rust Buster, pirate4x4.com)
Illustration: template patterns, plate cut to shape, edges ground.
Step F — TACK & align (very important)
- Tack weld at multiple points (staggered) to hold the patch with clamps and check alignment frequently. Use fixture/strongback if necessary to keep rails straight. If you’re repairing near a suspension or body mount, re-check dimensions to factory spec. (twi-global.com)
Illustration: clamped patch with tack welds shown and tape measure checking critical distances.
Step G — Final welding (how professionals do it)
- Welding technique: use MIG with ER70S-6 (0.035″) and 75/25 Ar/CO₂ gas (or flux-cored if outdoor). Run short runs (stitch / skip welds or back-step method) in a balanced sequence — this controls heat input and minimizes warpage. Let the part cool between runs; weld both sides if accessible. After each run, check alignment. (harrisproductsgroup.com, twi-global.com)
Practical settings (example starting point): 0.035″ wire, 18–24 V (machine dependent), wire speed and travel tuned for smooth spray or short-arc — your welder manual/wire chart is the primary reference. (Settings vary by machine and thickness.) (Weldcor)
Illustration: sequence diagram showing stitch pattern and back-step order across the join.
Step H — Reinforce & finish weld
- Grind welds flush where needed, but leave fillets where the frame needs strength (don’t over-thin with grinding). If the area is suspect, weld on fishplates (3/16″ plate 8″×3″ style or shop-made) overlapping both sides and weld perimeter. (eBay, pirate4x4.com)
Illustration: fish plate being clamped in place and welded; finished weld cross section.
Step I — NDT & inspection
- Inspect welds visually and with a magnet or dye-penetrant / magnaflux (mag particle) if you suspect cracks. Look for lack of fusion, porosity, or undercut. Re-weld & grind defects. (Professional shops may perform dye-penetrant / magnaflux checks for structural repairs.)
Illustration: magnified view of a welded joint with a dye-penetrant test being applied.
Step J — Corrosion protection & sealing
- Clean welded area, degrease. Apply weld-thru primer where future spot welding might be needed; POR-15 or epoxy primer over the welds; seam sealer at joints; then topcoat with underbody coating. Internally spray the inside of boxed rails with Fluid Film / woolwax or internal frame paint to stop rust starting again. (POR-15, YouTube)
Illustration: cross-section showing POR-15 coat, seam sealer bead, and internal frame spray.
Step K — Reassembly & torqueing
- Reinstall components (suspension, crossmembers, body mounts). Replace body-mount hardware if corroded. Torque body-mount bolts to factory spec — if you don’t have FSM, common shop practice for body mount bolts is ~20–30 ft-lb for many Toyota models but double-check the FSM for exact values. (4crawler.com)
Illustration: reinstallation with torque wrench and annotated torque value reminder.
Step L — Final checks
- Road test carefully; re-check alignment, noises, and fasteners after first 100 miles. Periodically inspect and recoat underside yearly if you drive in salt/wet areas.
5) Shop tips & gotchas (from pros)
- Match thickness carefully — don’t over-stiffen locally (very thick plate welded to thin rail can create stress risers). Most shops use 3/16″ caps or 11 ga replacement kits for late-model 4Runners. (pirate4x4.com, Rust Buster)
- Control heat — use stitch/back-step welding, clamp heavily, and let the part cool. Large continuous welds warp frames. (twi-global.com)
- If the frame is bent: don’t just weld — get the frame pulled on a frame rack before welding. Welding a bent frame without straightening can hide alignment problems and cause premature component wear. (rts.i-car.com)
- Use OEM-style kit where possible — companies sell pre-cut caps and repair kits for 3rd-gen 4Runners (they often match bolt holes and contours). This speeds up accurate, repeatable repairs. (Rust Buster)
6) Quick checklist you can print (short)
- Inspect & mark cuts; measure OEM dimensions
- Remove components & support vehicle safely
- Cut out to solid metal (+1″ margin)
- Sandblast/grind to clean metal; bevel edges
- Cut A36 patch (11 ga or 3/16″ depending on area)
- Clamp & tack; check alignment
- MIG weld ER70S-6, 75/25 gas — stitch/back-step method
- Grind & inspect (dye/magnaflux if structural)
- Apply weld-thru primer → POR-15 / epoxy → seam sealer → undercoating
- Reinstall parts; torque to spec; test drive; recheck
7) Sources / where the practice comes from (key refs)
- Mild steel / A36 and plate usage in chassis fabrication. (alro.com)
- Aftermarket 4Runner frame repair kits and common shop gauges (11 ga, 3/16″, fish plates). (Rust Buster, Amazon)
- ER70S-6 welding wire and recommended gas blends for auto body/frame welding. (harrisproductsgroup.com, millerwelds.com)
- Welding distortion control and stitch/back-step welding techniques (TWI / Lincoln Electric guidance). (twi-global.com, lincolnelectric.com)
- Corrosion-stopping products for frame restoration (POR-15, internal sprays like Fluid Film). (POR-15, YouTube)